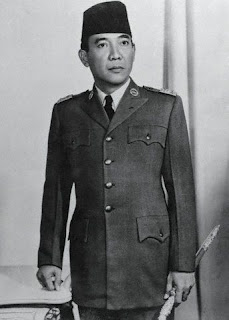
 Step 1: The key to this technique is to pick a starting image with lots of light/dark contrast and a good amount of dark shadows. Depending on what use you have in mind for the final image make sure to choose a suitable size (width x height) file that is at least 200 pixels/inch (ppi).
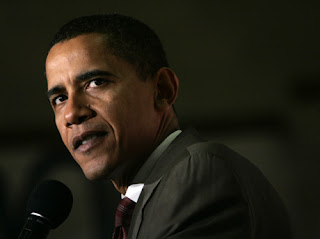
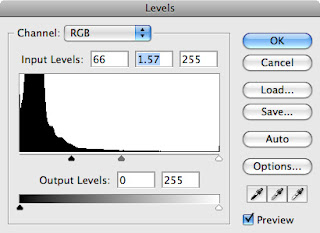
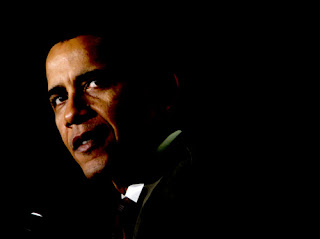
Step 2: Darken the image by adjusting the levels. Image > Adjustments > Levels (Command + L). As you will notice I only moved the left (black point) and middle (midtone) sliders. By moving the black point slider to the right I deepen the shadows by converting the darkest gray pixels in the image to black. By moving the midtone slider to the left I intensify the highlights by boosting the lightest (white) pixels in the image.
Step 3: Convert the image colormode to Grayscale. Image > Mode > Grayscale.
Step 4: Select the Pencil Tool (B) and set your foreground color to Black. Now paint over everything (microphone, neck, collar, tie, ear) except the main face highlights.
Pilih Pencil Tool (B)

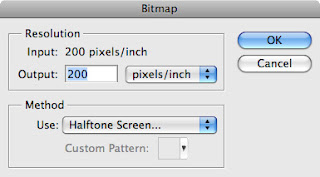
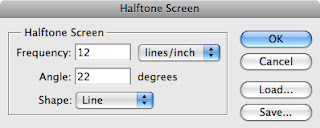
Step 5: Convert the image colormode to Bitmap. Image > Mode > Bitmap.
Step 6: Once again, convert the image back to Grayscale and leave the Size Ratio set to 1. Image > Mode > Grayscale.
Step 7: Finally, zoom in and clean up the messy edges by painting over them with the Pencil Tool (B) set to a Black.

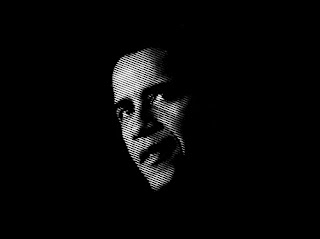
Done...
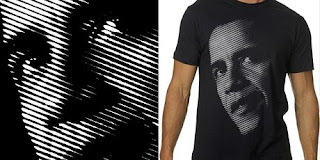
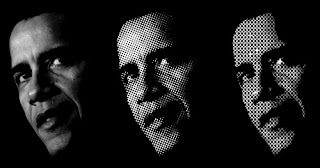
Photoshop Halftone Effects Tutorial: Final Result
Extra: By changing the Frequency, Angle and Shape settings in the Halftone Screen dialog box you can create numerous looks that work well with a wide range of design projects. To get really creative try changing the Bitmap Method to a Custom Pattern of your own. Grayscale, Round Halftone Screen, Custom Bitmap Pattern using Obama "O".
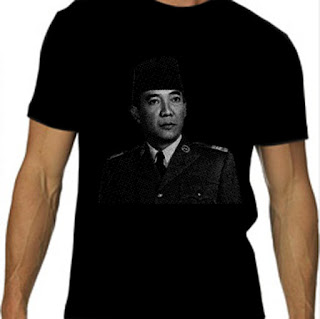
ini hasil percobaan we..


:( dhe mau nya poto wee dibuat stamp ke baju dhe :|
ReplyDeletephotonya Obama :D
ReplyDeleteAtashi daisukiiii XDD I love free tutorial of photoshop!! XDDDD Sankyuuuuuu~
ReplyDeletecara bikin gambar vektor gmna nih? :O
ReplyDeletekeren hasil postingannya ... bisa les privatkah ini hehehehehe
ReplyDelete@Dhe..
ReplyDeletemangnya beneran mau dhe :)) ntar deh we buatin :$ tapi pict we yg belakangnya ada setannya ya:(( biar bisa inget trus :))
@Ino
iya.. beruntung banget we nemu ini tutorial.. kabarnya sih design ini laku bnget d afrika apalagi;;) belum d cetak bajunya tapi udh bnyak yg pesen:$
@cheening
me too,, please share some tutorial:X
@Sandiasa
:f tergantung kk:$ mau buat vector yg kaya gmana?? jng² udh class pro pula nih:o bagi ilmunya duonk:|
@indrajka
aduh oom:? saya juga masih newbie nih:@ cuma mau berbagi koleksi aja:D
@all :xsalam kenal ya:s