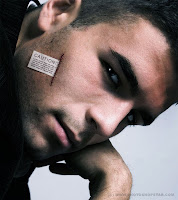
 Firstly, you should find a stock photo to work with. I prefer to use this one. Also you can use Google Images to find some interesting pictures you like. Ok, duplicate the background layer then press Ctrl+J and press Ctrl+Shift+U to make the image black-and-white.
Set up opacity to 80% for this layer and apply Quick Mask Mode with gradient as below:

Then go back to Standard Mode. Now we have some selected area.

Press Delete to clear image into the area and press Ctrl+D to deselect area.

Time to add some graphic details to the background. I would like to use these brushes for the tutorial. Then with the Brush Tool selected load brushes to brush palette. After that choose the brush from the standard Photoshop palette as shown below:

Chen chose the foreground color as black and make a print on the new layer as on my picture:

Then select another one brush from the palette:

And create clouds on the wall on the new layer again:

After that choose the last one brush sample:

And add some black spot on the new layer:

For now I think we should add some text. Get out the Horizontal Type Tool (just the regular one) and write out something like on a picture below using black color:

The font I used below Bearpaw (80 pt, Crisp) is commercial. Feel free to use another one with hieroglyphs or buy or get somewhere this one. Now rotate the text a little bit left using Edit > Free Transform as on picture below and change opacity to 70%:

Now merge all layers with brush prints. Then select the Polygonal Lasso Tool and make selection of girl silhouette. After that press delete to clear selected area.

Remove the selection with Ctrl+D and merge all layers in one. Now duplicate layer with Ctrl+J and apply for this layer Filter > Blur > Gaussian Blur with similar settings to these:

Now we have the next picture:

Change layer mode to Soft Light and set opacity up to 50%. Now merge two layers in one again.

Create a new layer and fill it with black color, then apply Filter > Noise > Add Noise with the next presets:

Now change layer mode to Screen for this layer:

To finish off the tutorial get out the Eraser Tool and a soft round brush and cut away noise everywhere except wall area on the photo:

Well, we're done for the tutorial! I hope you enjoyed it, even just a little bit.

Broken Dreams Tutorial: Final Result
Download pict here
Download brush here (pass.weknow51)


:| kok photo dhe dibuat gitu we...
ReplyDelete