 Download Fabric Linen by Jaqx Textures here. Create a new document of size 500x708 pixels. Drag the texture downloaded into the working document. Name this layer as Fabric.

Create a Levels Adjustment Layer and key the settings as 34, 1.00, 255. Follow by another Hue/Saturation Adjustment Layer and set Hue to 0, Saturation to 46 and Lightness to -60.

Set the foreground color to #FF9000. Create a new layer and name it as Stripes. Draw a few vertical lines with various widths like the example below. Set the Blend Mode of this layer to Overlay.

Select the Custom Shape Tool and pick Sign 4 from the preset list. Make a path with that shape at the middle of the working document.

Go to Paths tab, select the path created and click on "Load Path as a Selection". Back to Layers tab, select the Fabric layer, press Ctrl+C to copy. Then press Ctrl+V to paste a new layer. Name this new layer as Badge. Go to Image > Adjustments > Hue/Saturation. Check on Colorize. Set the Hue to 200, Saturation to 45 and Lightness to 0.

Ctrl+left click on the Badge layer to load a selection. Create a new layer and name it as Border. Fill the selection with #FFFFFF. With the selection still on, go to Select > Modify > Contract. Set contract by 20 pixels. Hit Delete.

Type the texts you want to appear on the badge.

Merge Border and your text layers into one single layer. Ctrl+left click on the layer to load a selection. You may delete the merged layer. Now with the selection still on, select the Badge layer, press Ctrl+C to copy. Then Ctrl+V to paste a new layer. Name this new layer as Badge Items. Go to Image > Adjustments > Hue/Saturation. Check on Colorize. Set the Hue to 0, Saturation to 65 and Lightness to 0.

Right-click on Badge Items layer and choose Blending Options. Check on Bevel and Emboss. Set the Style to Pillow Emboss, Size to 5px, Highlight Opacity to 30% and leave the rest of settings as default.

We need to create a new brush now. Open up the Brushes Palette. Go to Brush Tip Shape and enter the settings as shown below.

Go to Shape Dynamics and enter the settings as shown below.

Ctrl+left click on Badge Items layer to load a selection. Go to Paths tab, click on "Make Workpath from Selection". Set the foreground color to #FFFFFF. Right-click on the path create and choose Stroke Path. Set the type to Brush and hit OK.

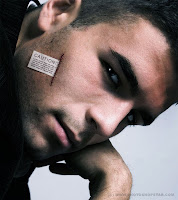
That's all and you are done! You may wish to adjust the colors of your badge items like what I have done. Hope you find this tutorial useful. Thanks!


No comments:
Post a Comment