
A Photoshop digital make up tutorial to practice esthetician's skills and experiment with a natural attractiveness of a human face. Final image can be used in cosmetics related web design.
Ok let's get started!
To complete this tutorial, you will need the following stock: Eye
Step 1
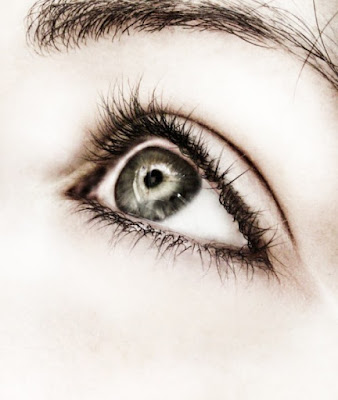
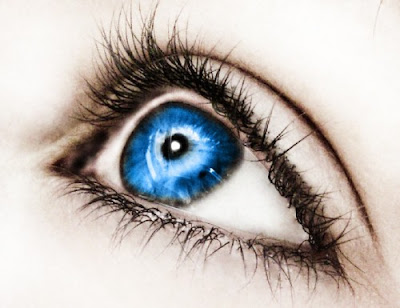
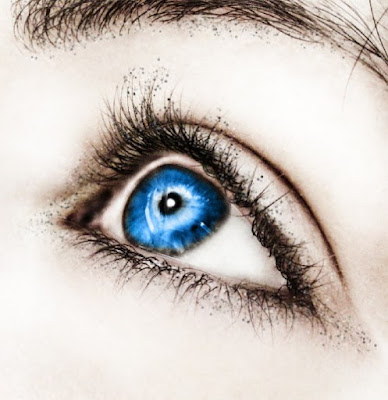
Load the "Eye" stock image into Photoshop, now let's take a look at the original image and here is the analysis I came up with:
1. The image has a lot of black spots, and bits of hair that really disturbs me
2. The skin is OK, but if we can make it smoother would be bettter
3. The eye colour is perferably better in Blue, and those bloodlines in the white part of the eye can go.
After you've done the above analysis, duplicate the background layer once and name it as "face skin"let's grab the Healing Brush tool (J):
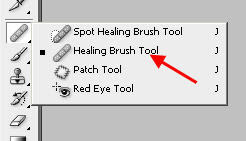
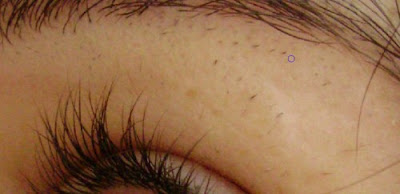
Set the brush size to 15px, and hold down the Alt to define a source point as shown below:
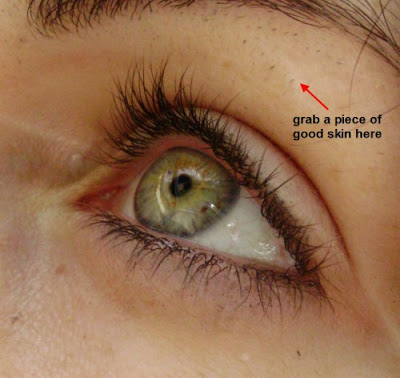
Gently work you brush around the spots you wish to heal:
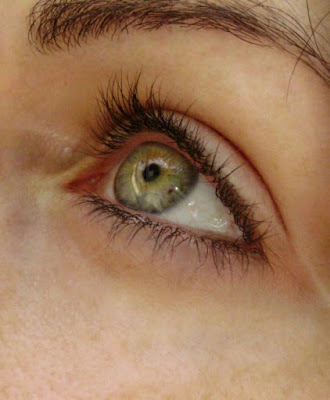
And clean up the lower part of the image as well, until you reach the following effect:
Step 2
Now we have a fairly clean face, let's tackle the eye. Firstly duplicate the previous "face skin" layer once and name it as "eye". Firstly we want to get rid of the bloodlines in the eye. To do this, again we use the healing brush tool, define a new source point on this layer as shown below:
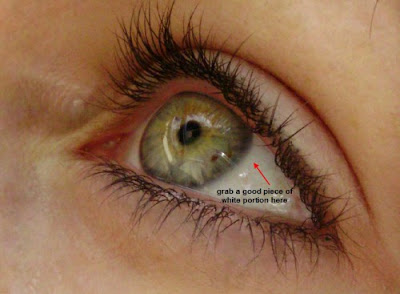
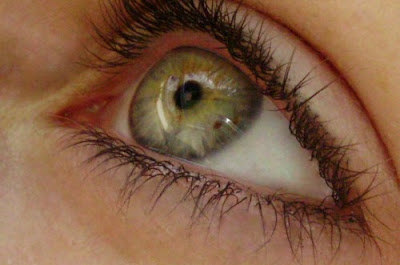
Adjust the brush size accordingly to around 10-12px, work your way around the white of the eye until you reach this effect:
Step 3
Now we onto the smoothening of the skin. We have used the healing brush tool before however, for the overall effect, it's really handy to apply the dodge/burn tool (O):
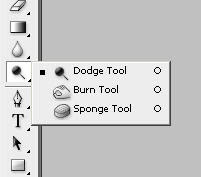
So duplicate the previous "eye" layer once and name it as "dodge and burn", use the dodge tool with the following settings:

The secret here to to set exposure level to a very low amount.
Work your dodge tool around the area you want the skin to become smoother and lighter, until you reach the following effect:
Please note, you will have to adjust the brush size for different area, for the best result possible. Practice with it!
Step 4
Ok we can tweak the image a bit by adding some image adjustment layers:
Black and white (Set to blending mode to "Screen")
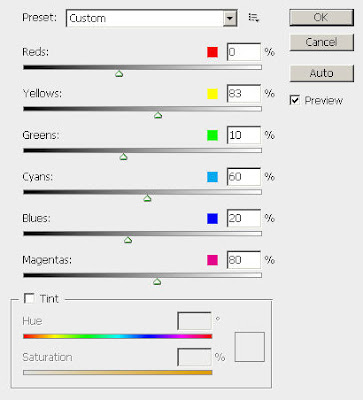
Duplicate this Black and White adjustment layer once, and change the blending mode of the duplicated layer to "Hard Light", you will have the following effect:
Now we're on the interesting part of changing the eye colour. I simply created a new layer called "eye colour" on top of all other layers, grab a soft, round brush with a light blue colour and paint around the pupil:
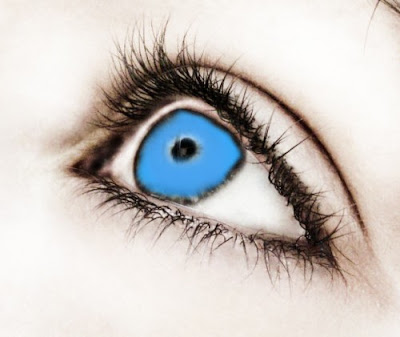
Change the layer blending mode to "colour" and you will have to the following effect:
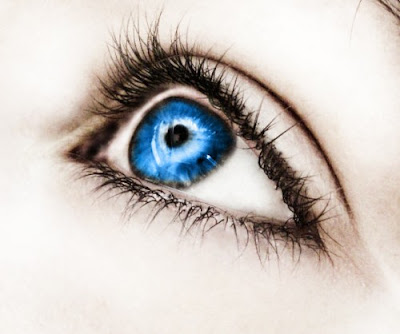
We can now add a shining reflection on the pupil. To do this, create a new layer called "reflection" on top of all other layers, grab a small white brush and paint on the centre of the eye, as shown below:
Step 5
Now we can add some dotty effect around the eye. Firstly let's make this dynamic brushset:
Shape Dynamics
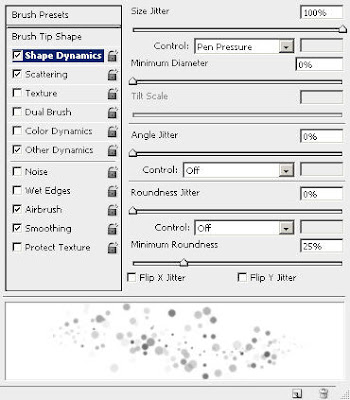
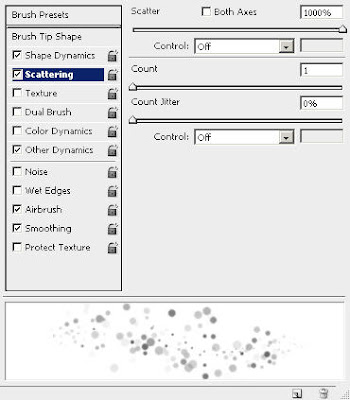
Scattering
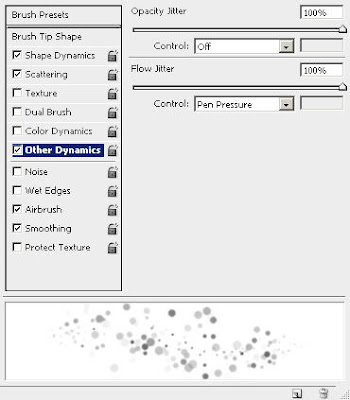
Other Dynamics
and make sure you tick "Airbrush" and "Smoothing".
Create a new layer, use this brushset to paint around the eye: (Set brush flow to around 40%)
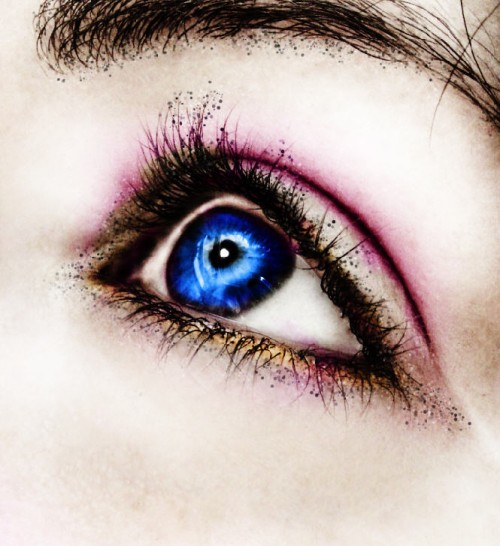
and we can add a curve adjustment layer to bring some depth into the image:
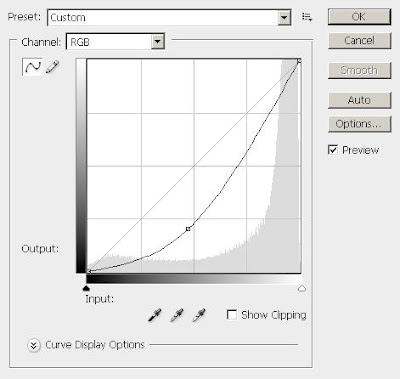
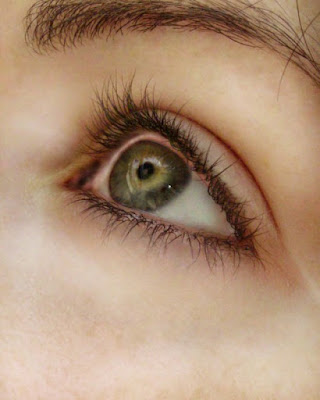
and you will have the following effect:
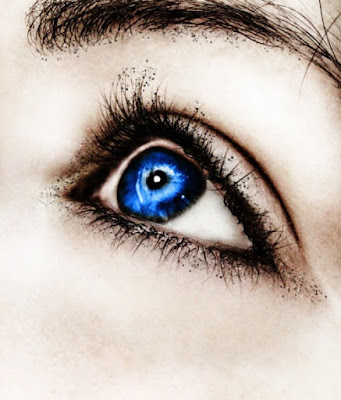
We can add some final effect onto our eye. How about some colours?
To add some colour around the eye, simply create a new layer on top of all other layers, set its blending mode to "overlay", and grab some nice markup colour you like and paint around the eye:
That's it for this tutorial! Hope you enjoy it. Cheers and have a nice day!


No comments:
Post a Comment